Computer, user and group are the fundamental yet important functions for employee monitoring. By sorting different computers or users into different groups, you can flexibly manage the group. You can create different policies and apply to different groups, so that any necessary actions are allowed and any unnecessary actions are blocked. This helps you to maximize your employees' productivity.
In SurveilStar Console's computer list or user list, you may see computer icon or user icon in different colors. The colors stand for different status of selected computer or user as below.
![]() The agent computer is being monitored normally.
The agent computer is being monitored normally.
![]() The agent computer is being monitored normally and the computer is curretnly idle now.
The agent computer is being monitored normally and the computer is curretnly idle now.
![]() The agent computer is not monitored. The computer has been shut down, or the computer is offline from internet now. It's also possible that firewall has blocked the communication between agent and server, in this case, please change firewall settings.
The agent computer is not monitored. The computer has been shut down, or the computer is offline from internet now. It's also possible that firewall has blocked the communication between agent and server, in this case, please change firewall settings.
![]() The agent has been uninstalled from the computer.
The agent has been uninstalled from the computer.
![]() The user is online now and being monitored normally.
The user is online now and being monitored normally.
![]() The user is away from the computer now.
The user is away from the computer now.
![]() The user is off line from internet now.
The user is off line from internet now.
In SurveilStar Console, IT manager can click menu Statistics > Basic Information to view basic information of computer, computer group, user and user group.
(1) Computer Basic Information:
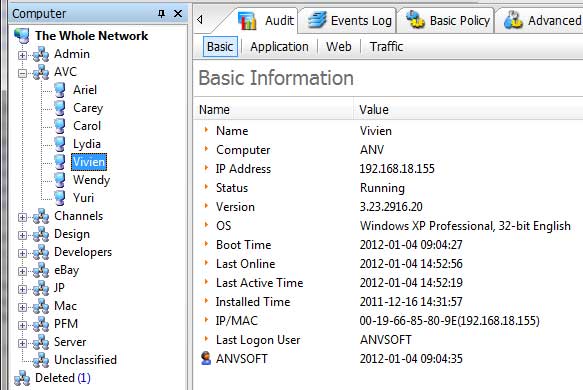
Select a computer and the status and basic information will be displayed in data display area.

Name: The name displayed in the computer list. If necessary, change it to your desired name. By default, it's same as computer name.
Computer: Computer name.
IP Address: IP address.
Status: Agent computer's running status. It may be Running, Running(Idel), Offline or Uninstalled.
Version: Version of installed agent.
OS: Agent computer's operation system. It includes OS type, OS edition, OS bit and system language.
Boot Time: Agent computer's boot time. It's available only when Status is Running.
Last Online: The time when agent can communicate with server last time.
Last Active Time: The time when agent computer is active last time.
Installed Time: The time when agent is installed on this computer.
IP/MAC: IP address and MAC address.
Last Logon User: The username which is used to log on this computer last time.
(2) Computer Group Basic Information:
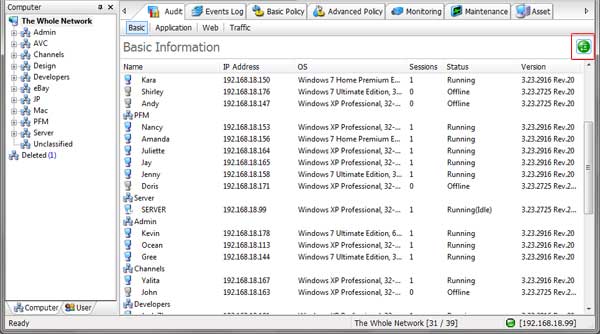
In computer list, choose a computer group, status of all the computers in this group will be displayed in data display area.

If you choose The Whole Network, all the computers will be displayed in data display area. click Expand button, the group will be unfolded.

(3) User Basic Information:
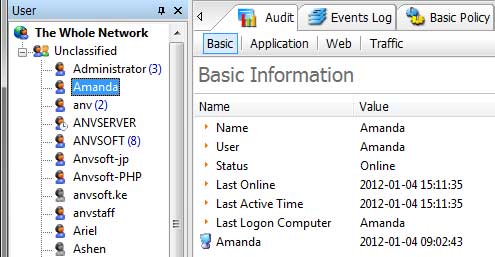
Select a user name to view user's basic information.

(4) User Group Information:
Select a user group to view the user group's basic information. In the same way, if you choose The Whole Network, you can click Expand button to unfold the user groups and view users information in this group.
By default, all computers and users will be listed in Unclassified group. Unclassified group can't be deleted or renamed, sub group can't be created in Unclassified group neither. According to different requirements, IT manager or supervisor can easily sort computers or users into different groups for convenient management.
(1) Create New Group
In computer list, select The Whole Network or a certain group, right-click and click New Group. Sub group can be created in currently existed group. Then give a name to the group and a computer group will be created. You can create user group in the same way in user list.
(2) Move To Desired Group
Now you can drag-and-drop desired computer to desired group. Or right-click on selected computer and click Move To..., select target group and click OK. In the same way, you can move a user to another user group. You can use SHIFT or CTRL key to move multiple computers or users at one time.
(3) Deleted Group and Unauthorized Group
Deleted computer will be listed in Deleted group, you can still use console to view all the data of deleted computer. If you want to restore this computer to original group, simply right-click the deleted group and click restore. If original group doesn't exist any more, the computer will be restored to Unclassified group. If there is no deleted computer, Deleted group won't be displayed.
If the number of the agent installed on computers is more than your purchased license, then some of the agents will be listed in Unauthorized group and the computers can't be monitored. If you want to monitor these computers, you may need to upgrade your license. If the license is not yet fully used, Unauthorized group won't be displayed.
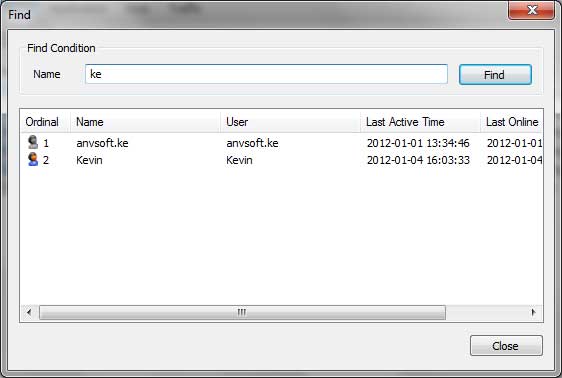
In computer list or user list, right-click on any point of the area and click Find... to search computer or user or group. You can also use menu File > Find... or press CTRL + F key. You can type displayed name, computer name, displayed username, username, IP address, etc. to search. Then you can double-click the result to open target computer or user or group. Below is an example of searching users.

If you don't want to monitor a computer or a group any more, you can simply right-click on the computer or the group and click Delete. You will be asked to enter password to take this action. After entering password correctly, the selected computer or all the computers in the selected group will be deleted.
Please note that deleting the computer or the group will also uninstall the agent in the computer or in the computers of the group, and the license authorizations on deleted computer or group will be also taken back. You can use such recycled license to monitor other computers if necessary.
Deleting user only deletes usre information and won't delete the license authorization. When the user log on once again, SurveilStar Console will display the user information again.
You can right-click on a computer, a group or a username and click rename. Or select the item first, then user menu File > Rename to rename to what you like.
| Chief introduction of SurveilStar Console | Back to Index | Basic Control |