 Google, Yahoo, MySpace, Facebook, YouTube … Whatever website they visit, SurveilStar keeps a detailed record of who, when, what, how long and how often they browse the Internet.
SurveilStar monitors every web page that is accessed on the computer and saves a chronological record for your review. And it’s much more than a simple website history. The website statistics report will summarize a char of top10 visited websites and other reports, so that you can quickly get a clear overview of what they are doing online.
SurveilStar effectively controls the website access from corporate network. Administrator can grant users with different websites visiting privileges. All website history will be tracked and recorded in details. It also supports to block any website from visiting.
A 30-day free trial version of this professional internet websites monitoring software is available. Feel free to download and try.
Are you looking for a solution to control users not to access websites which are irrelevant to work e.g. online game, video sharing, online shoppint, online stock trading website, etc.
Now, we are going to show you how to apply website policy in SurveilStar to block some websites during office hours.
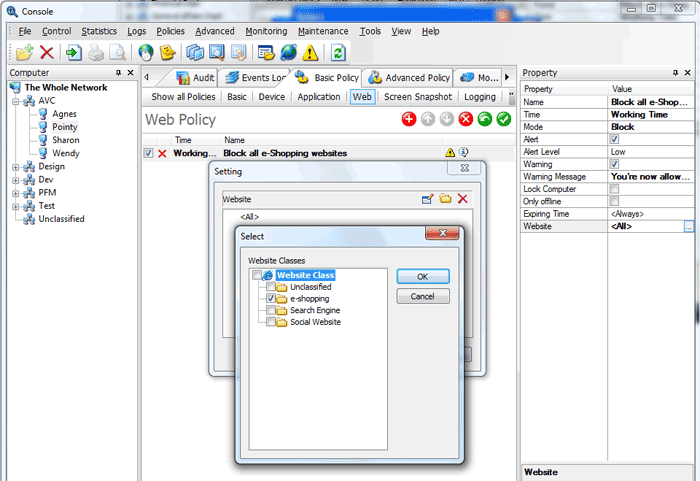
Login SurveilStar Console, select the target computer (group) that you want to apply the policy. Navigate to Basic Policy > Web.
Click ![]() button to add a new website monitoring policy.
button to add a new website monitoring policy.
Go to the Property panel. Enter policy name. Select Block mode. Check both Alert and Warning options. Enter the warning messages. Type a website with complete URL, for example, www.porn-videos.com, or type website addresses that contain certain keyword, for example, *game*,*porn*, etc., or select a web class.
Click ![]() button to save and apply website visit blocking policy settings.
button to save and apply website visit blocking policy settings.

When the monitored user is going to visit the prohibit website, SurveilStar agent will block the website visit immediately and send user the warning message at the same time.
The Alert notification will also pop up if SurveilStar Console is running.
How to Establish Website Classes?
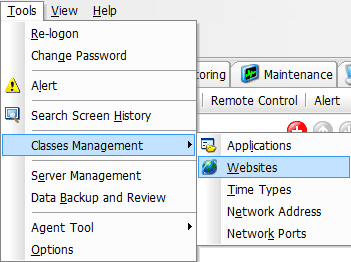
Navigate to Tools > Classed Management > Websites

In the open Website Class window, click add new folder tab to create a new website class folder, and right click to rename the folder.
To add a website to the website class folder, please click Operation > Add > Website Identity, and then input the URL (support wildcard match and complete URL) and assign a name to this new website identity.

Review Website Visited Statistics
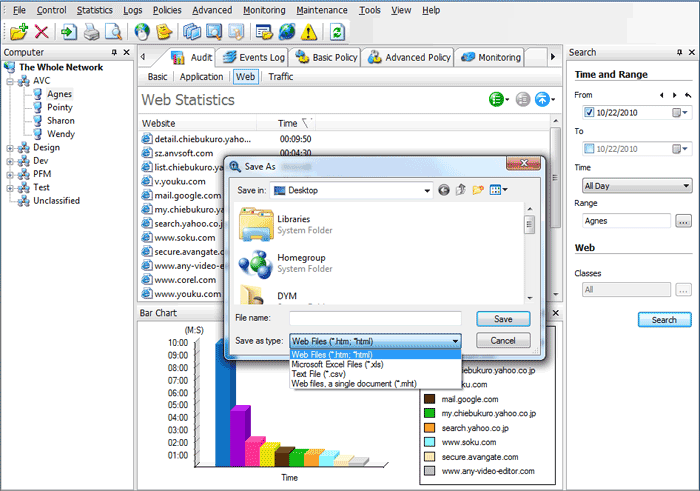
Navigate to Statistics > Website.
Here you can review website visit statistic. When you view the website statistic, you can neasily see how long these website browsing by using the statistical data, Bar chart or Pie chart. Also you can export the application statistical data in HTML, Exel or txt format for further analysis by clicking menu File > Export.
In the right panel, you can search website surfing history by specifying time, range, and web class.

Review Website Even Logs
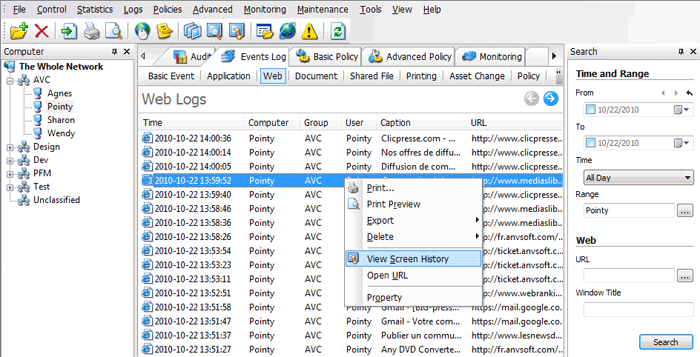
Navigate to Logs > Web.
Here you can review the details of web browsing history including time, computer, group, user, caption, and URL.
Right click on any log, you choose to Print/Print Preview, Export, Delete the log and read the details of the log. You can also View Screen History, open URL or read the property of the log.
In the right panel, you can search web logs by specifying time, range, web URL or Window Title.
